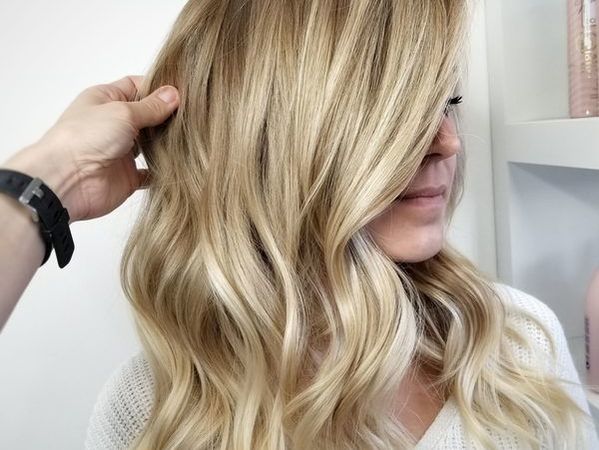
 The word “balayage” is a french word meaning “to sweep” or “to paint.” It is a technique for highlighting in which the lightener is hand painted onto the hair to give it a natural, gradual transition. Overall it gives a really blended natural look with no harsh or obvious regrowth lines.
Basically, it leaves a sunkissed, natural glow to your hair by using various tones of light and dark to create multiple dimensions of colour. The lightener is painted directly onto the surface of the hair and is not saturated right through until the tips of your hair. This is what creates the natural progression of the dye, leaving a beautiful natural look. Depending on how light you want to go, the process uses a clay-based lightener, which is much less damaging than typical lightener used to highlight hair. Its consistency is much more thick, which is why it's used for open-air highlights. With this method there is no need for foils. Once the clay based bleach dries, it stops working, which avoids the worry of over-processing and damaging your hair. Here are some reasons to consider balayage at your next visit... 1) You're looking for a change If you are looking for a bit of a hair change-up the season, balayage may be the answer to your hair prayers. Fall/winter is the perfect time to add a natural glow to your hair moving into the cooler months. Since a balayage grows out beautifully, it leaves you free to change up your hair again for the spring if you wish. 2) Added Colour Dimension Balayage adds beautiful dimension to your hair in the most natural way. If you are apprehensive about colouring your hair or nervous about a dramatic change, balayage is the perfect way to meet in the middle. You know the way the sun catches the light and dark tones in your hair that you didn't even know your hair had? Balayage does the same thing but, well, permanently. 3) It’s Low Maintenance Typically, people avoid colouring their hair because of the maintenance that follows to keep their hair strong and healthy and to keep the colour looking fresh. Because of the way balayage is hand-painted onto the hair the colour grows out seamlessly and there are no harsh growth lines. This means less trips to the salon and less need to continuously re-colour your hair! If you invest in some quality hair products, you will be all set. 4) It's Suitable for all Hair Types What I love about balayage is that it works great on all hair types. Whether your hair colour is dark or light, or your hair type is wavy, straight, curly, short or long, balayage will most likely suit your hair, as long as you have the right hair colourist. If you have a great colourist, they will know exactly which shades will be realistic and work best for your hair colour, creating a placement unique to just your hair. So, You're Ready To Explore The World Of Balayage? Here's What To Ask Your Hairstylist Consulting with your hairstylist before making the commitment to colour your hair is extremely important. It gives them a chance to advise you on which shades to go with, as well as for you to get a feel for them. Most hair salons offer free consultations, so don't be afraid to ask for one. If you'd like to consult about trying a balayage on your hair, feel free to email me directly at [email protected]
4 Comments
 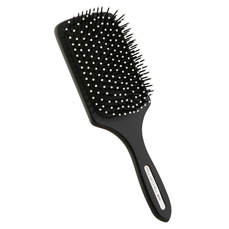 When it comes to makeup, our looks are only as good as the brushes we use. Hence why you’ve convinced yourself to splurge on that $60 contour brush. Well, the same rule applies when it comes to hair. The only difference is, when was the last time you actually thought about your hairbrush? While we constantly give praise to our more beloved straighteners and curling wands, the powers of a good old hairbrush (aka the unsung heroes of hair styling and hair care) are typically overlooked. If this sounds relatable, you’re probably in need of the right hair brush. Choosing the right hair brush and using it correctly can make all the difference in achieving your perfect hair look. There are so many different kinds of brushes on the market... but do you know which one to use for what? Are you using the brush that is right for you? Here's a quick guide on the most popular and widely used hairbrushes: # 1 Paddle Brush Hair type: all Best for: detangling hair Owned by many, the paddle brush is known for its ability to quickly detangle hair with ease and comfort. Not only does its flat, wide, rectangular surface allow the brush to move with your control but it also provides exceptionally smooth results without breaking the natural pattern of wavy and curly hair. For a pin straight look use the paddle brush to prep the hair and follow with the flat iron. Pro Tip: Paddle brushes are made with different types of bristles. For thick hair, choose a brush with sturdier bristles like nylon and synthetic, which can run smoothly through textured hair. 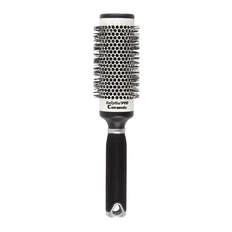 #2 Round Brush Hair type: medium to thick Best for: blowouts With the proper round brush and a lot of practice (and lots of upper body strength), you can nail salon fresh blowdry at home. Typically, round brushes are made with a metal or iconic barrel which heat up when used with a blow dryer (it works pretty much like a curling wand). The round brush helps tame frizz and delivers the desired amount of bounce to your hair. Not only are there tons of bristle options when it comes to round brushes, but they also come in a variety of sizes. There are two things to consider when choosing the size of your round brush: the length of your hair and the size of the curl/wave you want to create. Round brushes are ideal for creating that volume and body in your hair. Small size brushes create a nice bend in the ends, while brushes with larger barrels are known to straighten hair and give body. 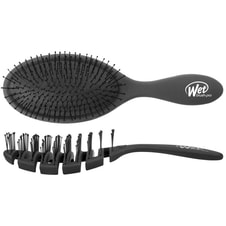 #3 Detangling Wet Brush Hair type: All Best for: detangling hair wet and dry fine hair Hair is at its more delicate state while it's wet. So to prevent breakage, you’re going to want a brush that is specifically designed to release tangles. Wet brushes are typically made with wide-tooth plastic bristles that can easily undo stubborn knots painlessly and easily. Because the bristles are super flexible, they work through the knots instead of breaking the hair. 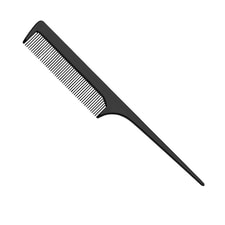 #4 Rat Tail Comb Hair type: all Best for: parting hair into sections Sometimes the best brush isn’t a brush at all. The rat tail comb gets its name from its long and skinny end, which is used to part the hair in precise, clean sections. Next time you want to wear your hair in dutch braids, part your hair into two equal sections with this hair comb. Believe us, it makes everything so much easier. This comb can also be used for gently backcombing your hair. 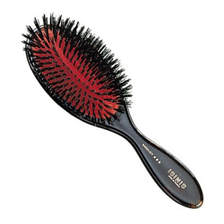 #5 Natural Boar Bristle Brush Hair type: fine-medium hair Best for: styling dry hair For high-shine Hollywood waves, you’re going to want to try the boar bristle brush. Although they might not look the most delicate on the scalp, the boar bristles are designed to gently glide through the hair (like the paddle brush) without snagging or pulling on roots, making it the go-to brush for women who have fine hair. Because of its ability to evenly distribute natural oils from the scalp through the hair, we recommend using the boar bristle brush after heat styling. You can also brush your hair right before bed to condition dry ends. Remember, finding products that are right for your hair type can make a world of difference. Try these different kinds of hair brushes out and see how you can transform your hair!
 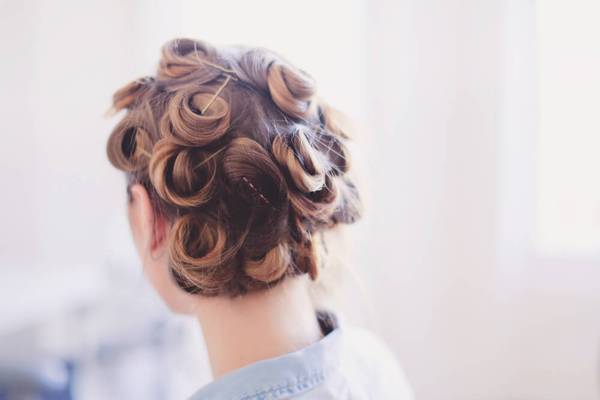 Oh how we love those beautiful, flawless, bouncy curls. But you know what's even better? Beautiful, flawless, curly hair that lasts all day.
Today I'm sharing my favourite tips and tricks on how to curl your hair to make it last all day! 1. GET YOUR CURLS TO STAY : COOL THEM DOWN One of the most effective tricks on how to get your curls to stay is to let the curl cool down and set before letting it go. Take each fresh curl (still keeping the curl shape) and secure it with a clip or a bobby pin. How does this work? Well, as you wrap your hair around the curling iron, heat is transferred onto the hair strands, which is what makes them change their shape. So once your pinned curl is cooled down, it will allow the cuticle to close and set in place, making the curl last for a much longer period of time. When unclipping your curls, be sure to let them cool down for a couple of minutes prior to brushing them out. If you break the curls too quickly, they will loose their form in a shorter amount of time. Hint: If you don't have time to wait 10-15 minutes for the curls to set, pin them all to your scalp and use your blow drier to blow cold air on them from a distance. Ever wondered what that 'cool' button was there for? 2. USE THE RIGHT HAIR PRODUCTS Help your curls! Apply styling products to your hair, which will help hold the curls in longer. Depending what works with your hair, apply mousse prior to drying your hair, or simply spray hairspray before, during and after curling. This will give your hair a more rougher texture which will help prolong the lifespan of your curls. All this is after applying heat protectant, of course - always remember the heat protectant first! Hint: Don't hold the hairspray too close to your hair as this will make your curls crunchy and heavy. You want to spray mist onto it, and wait a few moments for it to dry prior to applying heat. 3. INVEST IN GOOD QUALITY HOT TOOLS For years, you may think that your hair is 'stick straight' and that 'your curls will fall apart in 20 minutes anyway.' You will think that as long as you use cheap, drugstore brand curling irons or curling wands. Only when you switch to better quality, higher-end hot tools, will you realize that the problem isn't in your hair - it's in the curling iron! Yes, they may be more expensive, however, they damage your hair less, they heat up better (so you will apply heat for a shorter period of time), and good quality curling irons will last you a very long time. We recommend to set your tools at a heat temperature of 300-350 F to achieve the optimal curl. If you are curling extensions, be sure to use a lower heat setting of 250 F. 4. USE THE RIGHT BARREL SIZE Barrel size is actually pretty important. It's easy to think that a bigger barrel curling wand or curling iron is what will give you those sexy Victoria Secret curls. I find, however, that most of the time, a smaller barrel will do the magic. Depending on your hair, of course, try using a 1" or 1.5" barrel, and see what difference it can make! Not only will the curls look better, but they will also last longer. Sometimes, using a larger barrel just leads to the curly hair loosening up faster and falling out. Also, it is important to differentiate between a curling wand and a curling iron, which will give you different types of curls. 5. YOUR HAIR STILL DOESN'T WANT TO CURL? Well, my beautiful friend, this is a sign that your hair is screaming SOS. Overly damaged hair (including split ends) doesn't curl well. Period. It's time to give your hair some love and get a trim! If you're doing all of the above things right, but just aren't sure of the techniques available on how to curl your hair - don't worry! It just takes some practice. 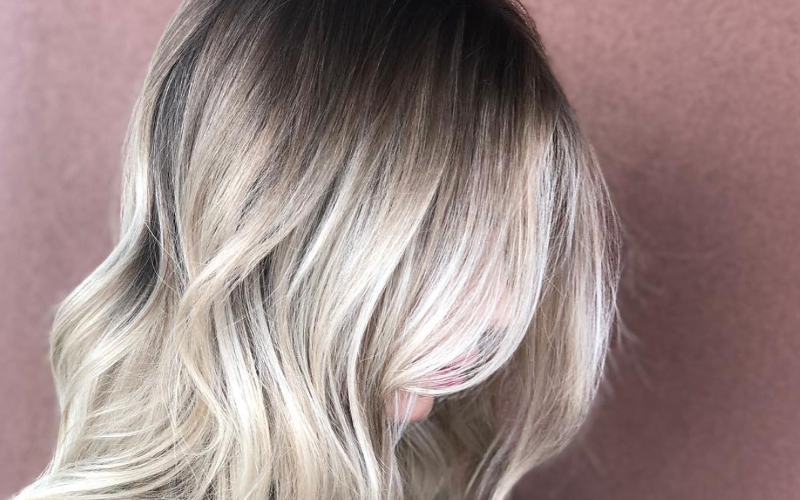 What is a shadow root?
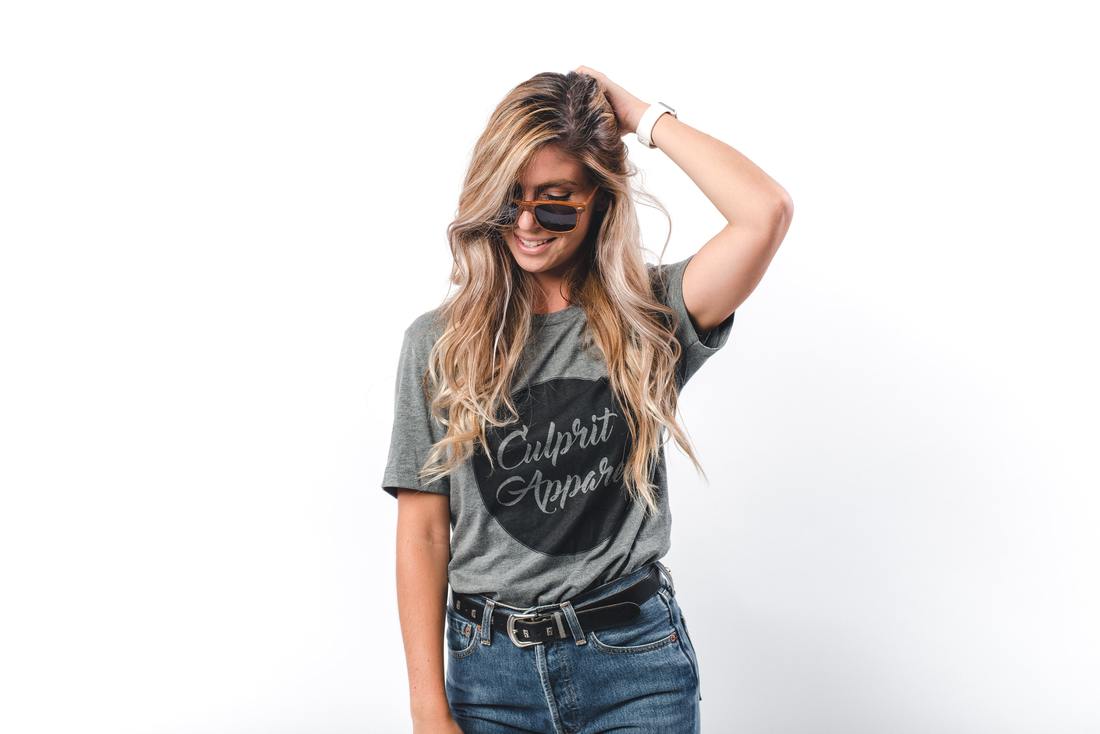
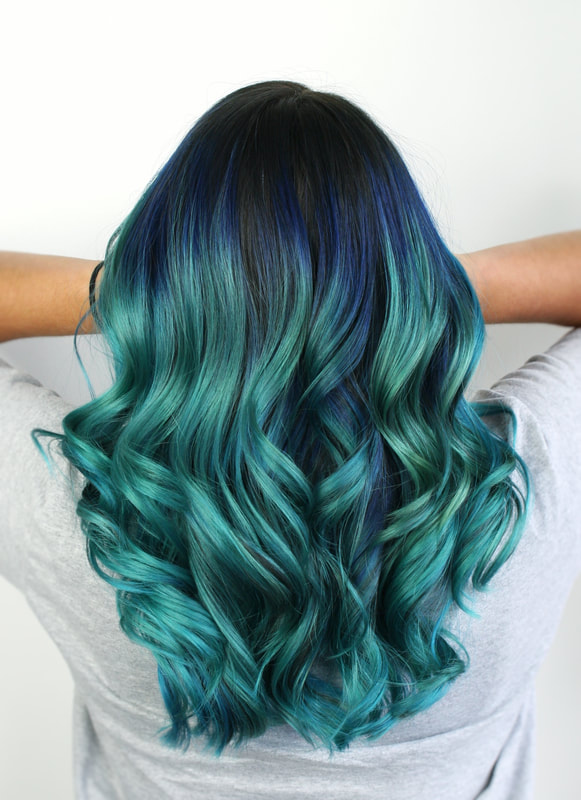
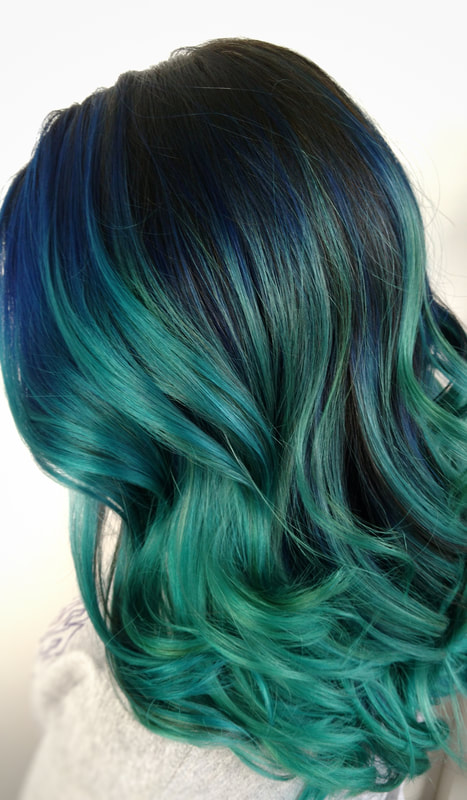
When you think of getting highlights, you probably imagine adding lighter, brighter pieces to give your hue more oomph. But a new trend growing in popularity on Instagram proves that achieving incredible dimension isn't just about the lighter strands. Creating natural-looking shadows in the hair with a technique called shadow toning is a stunning way to give your color depth while making the transition from your natural shade much more seamless. Shadow hair is a new hair colour trend that helps mimic the ombré of virgin hair. This works really well for someone who likes the idea of highlighted hair but hates the idea of being in the salon every four to six weeks. You can go as long as four months without retouching your roots with this trend. So, how does it work? I use shadow toning along with babylights and balayage to give a soft, organic root. At the shampoo bowl, a customized formula of demi- permanent colour is applied at the root area, leaving out the hairline to maintain brightness. I let this develop for 5 to 10 minutes and apply a toner to the mid-lengths and ends, which has been formulated to meet the client's blonde needs. We generally to choose a toner that's the same shade as your natural hair or, my personal favorite is to go a half-shade deeper than the natural hair colour. That's left to process until the desired color is achieved and then it's rinsed out. This gives a grown-out, more natural vibe to the highlights. The #shadowroot hashtag brings up mostly shades of blonde, however, the shadow-hair look can work on any color. It's a really good way of lifting a darker base lighter and keeping it looking natural. The babylights in foil create maximum lift on darker hair, and the shadow tone ensures it looks natural and can be formulated to complement all skin tones. Shadow tone teamed with some face-framing babylights is my go-to technique for a natural beach-blonde look. You can still have the lightness that everyone wants higher up but without the maintenance that faces you with a traditional highlight. Its exciting how low-maintenance shadow hair can be. The regrowth is natural and ultra soft with no harsh lines.  Have you ever thought about going blonde? Sometimes going lighter requires a lot more effort than Pinterest and Instagram lead you to think. Even the most subtle change, such as going from dark brown to light brown means the better part of a day in the salon. A change in colour sometimes feels exciting, or necessary, but consider the steps needed to get there before making your final decision. 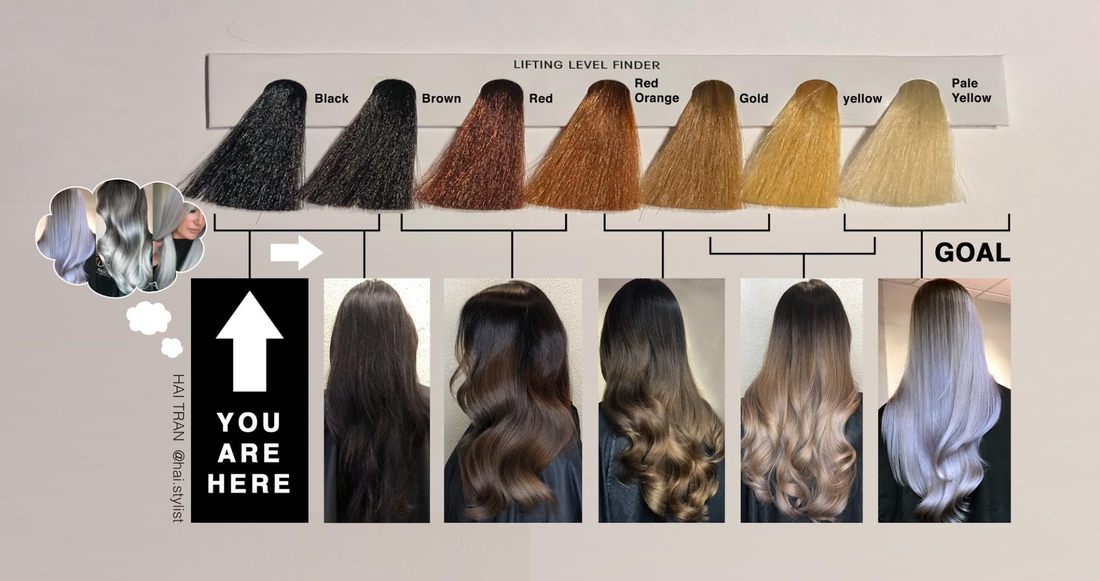 Bold Hair Goals So your a natural brunette with an inner Blonde just aching to emerge in her fair-haired glory? You’ve seen your fave celebs go from raven black to platinum blonde over night and back again…twice…and you feel ready to embrace your lighter side? Well the reality is that the journey to becoming a blonde is not one for the faint of heart! Everyday we help make hair dreams come true by transitioning dark haired beauties to show stopping blondes and so we know how important it is to be fully informed with all the important things you need to know to make an informed decision and know what is involved in becoming a blonde…and what is involved in staying a blonde…because it isn’t just a hair colour…its a way of life! Going Blonde is a Journey The truth is going from brown to blonde may require 2-3 or even 4 sessions of lightening to gradually take you lighter without causing excessive damage to your lengths. Each round of lightening will remove more of your hair's underlying pigments, which are primarily warm tones such as red, orange and yellow. Most brunettes request the coveted ash blonde shades, but the truth is you have to be comfortable living with warm shades for quite a while before achieving the goal. In most cases your hair will decide how light you can go. Once the hair looses elasticity, going lighter may mean your hair ends up on the floor. A good stylist will know when to say no.
Prepare to Spend $$
If you get the go ahead to start going lighter, consider the overall investment. In most cases, global lightening and glossing requires many hours of work and loads of lightener and colour. Your stylist will forgo taking on other clients to focus on your hair for a good part of their day. This means you'll most likely be charged an hourly rate to make up for the time. Maintenance appointments every 4-8 weeks are also to be considered unless you are okay with ghastly regrowth. Going blonde can be beautiful and flattering, but the upkeep and maintenance can be surprising for many people. Treat Your Hair Right An important part of maintaining your beautiful blonde is to make sure the toner/gloss lasts as long as possible. The toner is a translucent demi-permanent colour that is put on at the basin after your hair has been lightened. It creates the unifying tone of your hair. Think of it like a ‘filter’ you would use on a photo to change the overall tone of the colours. Toner is continuously washed out of the hair each time you shampoo and generally lasts 10-12 washes (or a lot less if you are a beach or pool lover!) A purple shampoo or conditioner is recommended to use at home to continuously combat potential brassiness by adding a bit of cool tone with each use. A bottle of dry shampoo, like L'Oreal's 'Day After Hair' can also go a long way to stretch time in between shampoos. You can always schedule a toner top up between full colour services. Ideally these quick sessions can be combined with a professional strength treatment such as Olaplex or L'Oreal Powerdose to give your hair a strengthening boost and keep it going that extra mile. 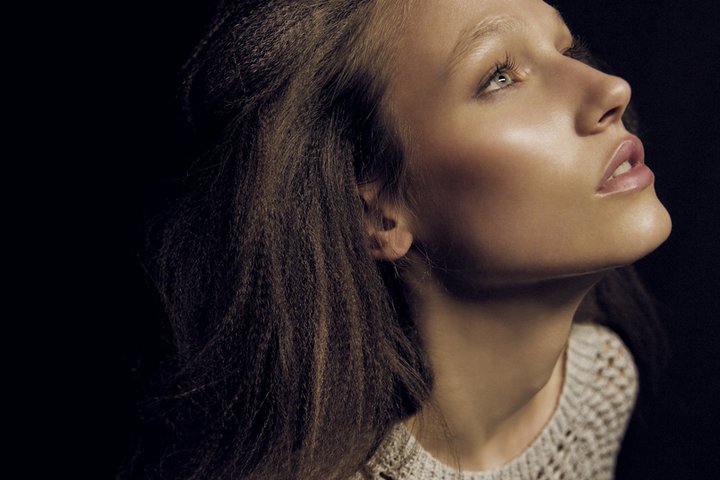 In the midst of a dry and cold winter season, having a lack of moisture in your hair is inevitable. In my previous blog, I talked about growing your hair out without giving up half way through. Today, we are going to dive into preventing breakage and some common ways hair breakage occurs, but few are aware of.
Brushing Did you know the way you brush you hair, and what you choose to brush it with, is one of the most common ways to cause stress and breakage to your hair? Remembering to be gentle with your hair by not ripping through it with a fine-toothed comb will take your hair a long way. For best practices, choose a wide-toothed comb, or my favourite a 'Wet Brush' and start from your ends, moving up as your hair detangles. If you have just stepped out of the shower, towel dry your hair as much as you can before setting out to smooth it. Hair is in its most vulnerable state when its wet. Using a reconstructive spray or oil in your hair while it’s damp can help with combing, and prevent further split ends and breakage. Ponytails We know, it’s one of the favorite and sometimes mandatory ways to get your hair out of the way. Especially with scarves, hoods and coats, throwing your hair in a ponytail or the infamous top bun, is a cute and simple solution. However, this repetitive habit is notorious for causing damage. Repeated pressure on the areas where that top bun sits will wear down the strength of the hair, often resulting in broken hair and split ends. This doesn’t even cover the damage that occurs when you remove the ponytail, you know, the yanking and pulling. Be gentle with this process, you will be surprised at how it effects the integrity of your hair. Heat Let's be realistic. Most of us need heat every day to make our hair look the way we want it to. We blowdry, flat iron and curl quite often. This isn't a problem, as long as you follow a few simple rules. Firstly, use a heat protecting product on your hair before you style. Usually a good argan oil, or thermal spray will do the trick. Second, turn the heat of your irons down. Just because it can go up to 450 degrees doesn't mean it should be used at that temperature. Turn it down to 350-375 degrees and give your hair some needed relief. Your hair will thank you! Chroma Salon is here to help keep your hair strong, healthy, and beautiful. I'm excited to work with you and help you grow your hair to that goal length, or give you the color you’re dying for!  The hardest part about growing your hair out is that awkward in-between stage. It's not quite short, not quite long, and seems to hit your shoulders in a weird way that makes it look frumpy. I've changed the length of my hair several times in my life. When I finally decided to grow it out before having my son, here are 5 things I did to help me resist the urge to chop it.
Accept that short hair looks different from long hair. This seems obvious, but believe it or not, this is easy to forget when you try to grow out your hair. If you have always been used to short hair, long hair will feel weird at fist. Some common things I hear from my clients are "It just doesn't have any shape" "It needs more of a style" "It feels blah" "It has no volume". Sound familiar? Give it some time. You will get used to it being longer and soon realize that it's just the difference between short and long hair that you have to get used to. Don't mistake this for the desire to cut it off. Curl it. When I grew my hair out, I curled it when it was in the awkward stage. Curls will add more volume and disguise any awkward layers. If you are tempted to cut it off, try wearing it curly for a while to see if that helps. Get it shaped. Growing your hair out doesn't mean you should stop getting it cut. I recommend going in every 8 weeks just to have it "shaped". This will keep the length but also keep the layers fresh. Sometimes layers can grow out to different lengths, making your hair difficult to style. Getting it shaped while you grow it out will help you feel like you still have an actual style, not just a grown out haircut. Put it up. I also put my hair up a lot when I was trying to grow it out. The awkward stage is usually right when your hair starts hitting your shoulders, which is finally long enough to pin it up if you want to. Experiment with different ponytails, simple updos and braids. The variety will help you enjoy your hair more. Switch up the color or cut bangs. If you need variety but don't want to cut it off, switch up the color or cut some bangs. Bangs are a great way to give you a completely new look without taking off length. As for color, avoid anything too drastic so you don't end up damaging it and ruining your progress. Sometimes a little change with the color is all you need.  Once the magic of the holiday season has passed, winter can quickly turn into a dull and gloomy season. But just because the weather makes you feel that way, doesn’t mean you have to let it bother you. And there’s no better way to shed the dullness of winter than by sprucing things up and feeling great with a new hairstyle. Spruce up your mood and your style with some these hairstyles that wow! Short And Sassy If you’ve been secretly dreaming about chopping off your long locks and opting for a short new style, then why not make it a point to go for it this year? There’s no time like the present to be bold and go for the style you want. You can have that pixie-style cut with a tightly cropped bottom and plenty of hair on top to play around with and style as you please. Modern Crop There’s nothing quite as chic as that above shoulder-style crop with an added twist. We’ve seen so many celebs go for this style because of its polished look and ease of maintenance. It leaves a few slightly longer layers of hair towards the front of the face to frame it. And then with a quick and simple touch of a curling iron, you can elevate that cut with a little bounce and volume. Beach Waves, Pinned Back For those with long hair, layers are always the way to go. And adding in the beach style wave with a sun-kissed balayage is the perfect way to add that wow factor to your hair during the winter. But if you want to take it a touch further you can add in a deep part and pin back one side if you’re looking to hit the town. Waterfall of Waves This is a style that looks particularly fabulous on those with ombre tones. With a simple hot tool such as your curling iron or flat iron you can whip up a waterfall of waves and make your hair stand out amongst the crowd. During the wintertime, we sometimes need to look for ways of brightening up those dull days and having that much-needed boost of confidence and vitality. So why not shake things up by switching up your hairstyle or having fun even with your current look? Book an appointment at Chroma Salon to explore some of these ideas that might just tickle your fancy. 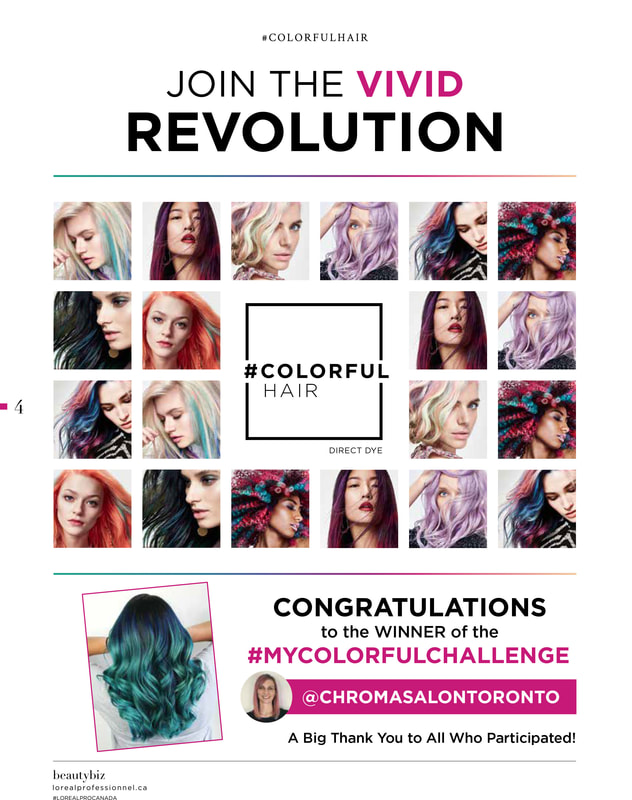 I am so excited to announce that my work was chosen as the winner of L'Oreal Professionel's Colorful Challenge! Creating beautiful works of art with people's hair has always been a passion for me. I am so excited to provide these types of artistic vivids services at Chroma Salon and make your hair fantasies come true! 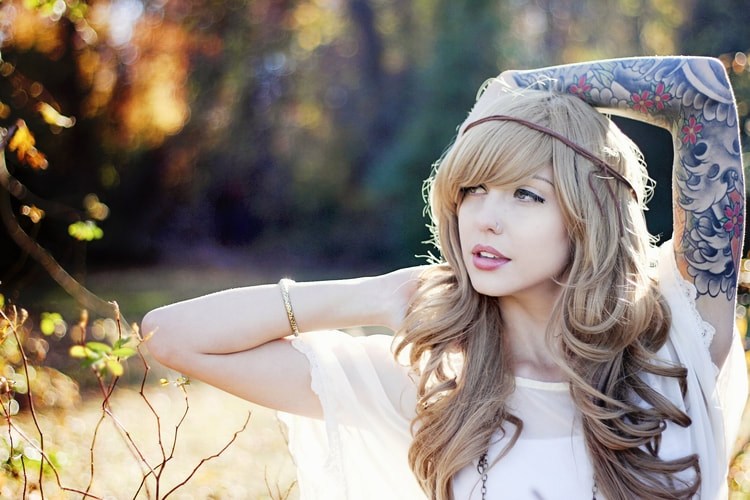 Play With Your Bangs Getting bangs is a major change but if you have them already there are a few things you can do to amp them up. For a softer look try adding layers. Once you’ve taken the weight away you can sweep them to one side or the other. If you have the attitude, a more dramatic look is to cut baby bangs. They really expose your face because they sit above the eyebrow. Add Layers (or Not!) This is a very simple way to change your look because you’re not changing the length, just the shape. If you have a blunt cut, layers remove the weight so hair looks lighter and gives a feeling of movement. The totally opposite option is to give your hair MORE of a blunt look by cutting it all one length so you don’t have any layers at all. Flat Iron Your Braids You don’t even have to come in for a cut to get this look! Braid a section of your hair using 3 pieces. Once it’s nice and tight, take a flat iron and run it from root to end, heating the entire braid. After it cools, unwrap the braided pieces and you’ll have a really neat wave. It’s so easy! I used to do this a lot for fashion shows and it gives hair an interesting wave. Using a dry shampoo or a texturing spray before you braid will thicken hair and help make it hold. My go-to for product for this is, again, L'Oreal's Savage Panache because it adds volume and density. Go Smooth Summer was all about embracing the beach wave. For autumn, take advantage of less humidity and frizz by flat ironing hair dead straight! I loved Kim Kardashian’s take on this look because it’s glossy and beautiful! Here’s how to get it: Shampoo and condition according to your hair type and towel dry really well. Then, use a product that adds shine and gives heat protection like L'Oreal's Mythic Oil. Blow dry with a large paddle brush to smooth ends. Once hair is mostly straight, flat iron from mid-length to ends so you’re not losing volume at the roots. Embrace A New Fall Colour A pretty simple change is to go darker! Get inspired by fall tones like auburns and coppers that will add warmth to your skin. If you’re feeling more adventurous, go for plums or violets. Blondes can tone down the lightness by adding lowlights that will give definition and add depth, especially to finer hair types. Move Your Part It’s incredible how such a small thing change the way you see yourself! Re-positioning your part will push against the hair giving massive volume and the illusion of more lift in front. A centre part can make your face look longer so it’s great for people with round faces while having a side part does the opposite. The result is a dramatic change, and no cutting needed! |
I've got you covered!YOUR ONE STOP SHOP FOR ALL THINGS RELATED TO HAIR AND HEALING. AuthorChristine White is a stylist, educator and the owner of Chroma Salon in Sarnia, ON. Archives
December 2023
Categories |


 RSS Feed